Wool applique...my favorite kind of applique! I find it to be easy, quick, and forgiving. Like all things quilting, there are a million ways to do it. And every quilter will have their own technique. No right or wrong, just take from this what works for you! I tend to be a less frills and gadgets sort of person so you might find yourself working with products not mentioned here. Totally cool! This is just my version of what's worked for me over the years. Here we go!
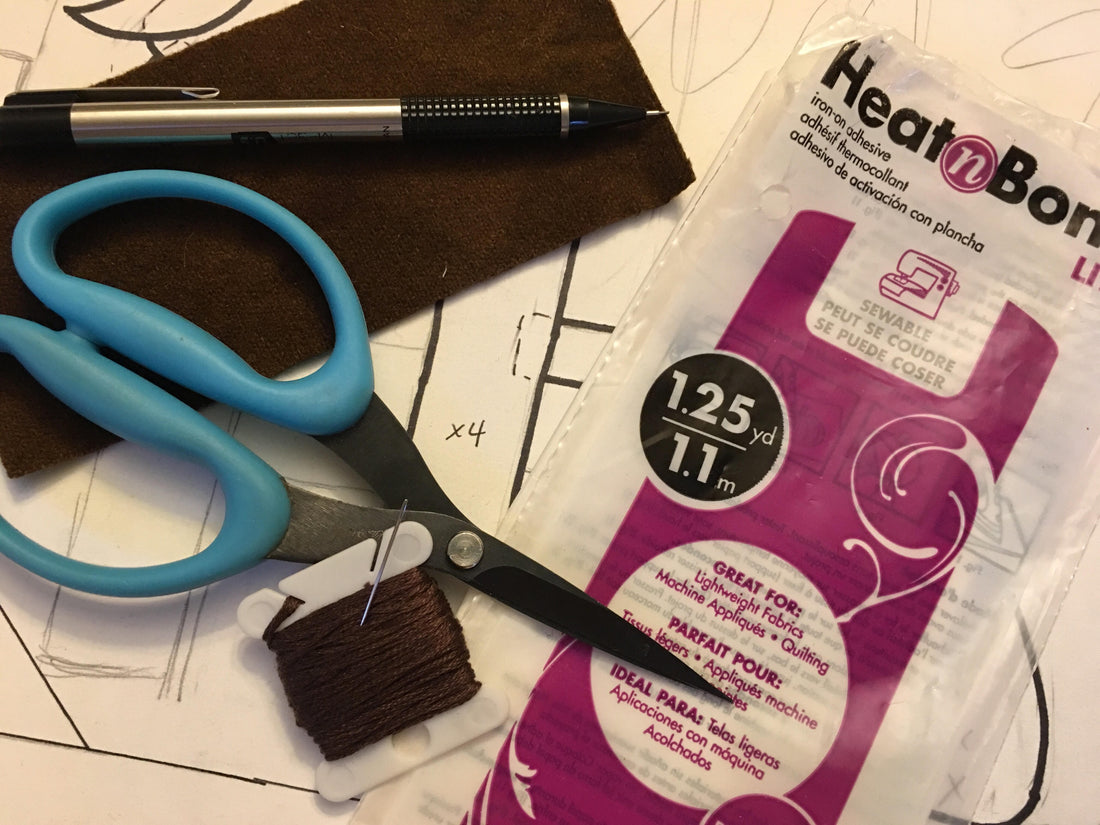
Start by gathering your supplies - your pattern, wool, a matching embroidery floss, an iron-on adhesive like Heat-n-Bond Lite, a pencil, great scissors (important for cutting wool so that you don't fray it as you cut), and a needle. I like to use a small quilting needle for this. You'll also need an iron.
Place your Heat-n-Bond Lite over your pattern, paper side up, and trace. You may want a light box for this to see the pattern more easily. Absent a light box, you can tape your pattern to a sunny window and trace over it that way. Take care to read through the pattern instructions before you trace. Many patterns will mention that the applique pieces are shown backwards so that they set up as shown in the picture.

Cut out your Heat-n-Bond pieces close to your traced lines and lay atop your wool, sticky side down. If you were using fabric, you'd lay your Heat-n-Bond on the wrong side of the fabric. With wool, it really doesn't matter. But take a look and make sure! Sometimes there's a side of the wool that I like the look of better. In that case, I lay the Heat-n-Bond atop the side I like less. Follow the instructions on your Heat-n-Bond to iron in place. With the product I'm using, I set my iron to medium, and hold the iron to it for just two seconds. Take care not to iron too hot or too long! If you do, it won't adhere...sad.

Let your wool cool, then cut right on the traced line. Carefully peel back the paper, and you'll be left with a sticky little coating on your wool. Perfect!

I made two of this shape...going to be fence posts. First is the sticky (or back) side of the wool. Next is the a piece from the front. Just looks like wool. :) Next is the little leftover piece from my cutting. I left this in there just to mention that you want to take care to align your Heat-n-Bond with the edge of your wool and hang onto those tiny little scrap pieces. Make yourself a basket of wool scraps and you won't regret it! Many patterns call for small pieces of this and that, and it's fun to rummage through that colorful basket.

Follow your iron-on adhesive's directions for adhering your wool to your background fabric. With Heat-n-Bond Lite, instructions call for a medium iron held in place for six seconds. These instructions work great with cotton fabrics, but we're using wool. I use a slightly hotter iron, about 3/4 of the way to maximum heat, and hold in place for more like 15 seconds. But I shift the iron around a bit to make sure I'm not leaving any funny imprints on the wool. That said, you can also just pin your piece in place and stitch it down. Either way, I recommend using an adhesive because it helps to prevent the wool from fraying.
Thread your needle with one strand of matching embroidery floss. OR use whatever floss/thread in whatever weight you like! Depends on the look you're going for. Occasionally I want more of an outline and will use a couple strands of black floss and a buttonhole stitch.

Finally, secure your wool in place with a little whip stitch. That's just an up and down little stitch that will barley show. Again, I like a buttonhole stitch if I'm going for more of an outlined look. But this easy whip stitch is my go-to. Take care to not pull the floss too tightly in order to avoid puckering fabric.

That's it! Questions? Let me know.
And...onto some fun news. This blog post was inspired by questions about wool applique regarding the Woolen Oak Stitch-Along coming up June 1, 2020. Visit our Group Facebook Page to learn more and sign up. We are a group of 12 designers working together to design a fall quilt! Cool right? I'm excited to be a part of it and really hope you can join us.
Take care, be well-
Sara